[2020] Building a vintage analog synthesizer - Clone of Minimoog Model D
>>> Download my matura paper <<<
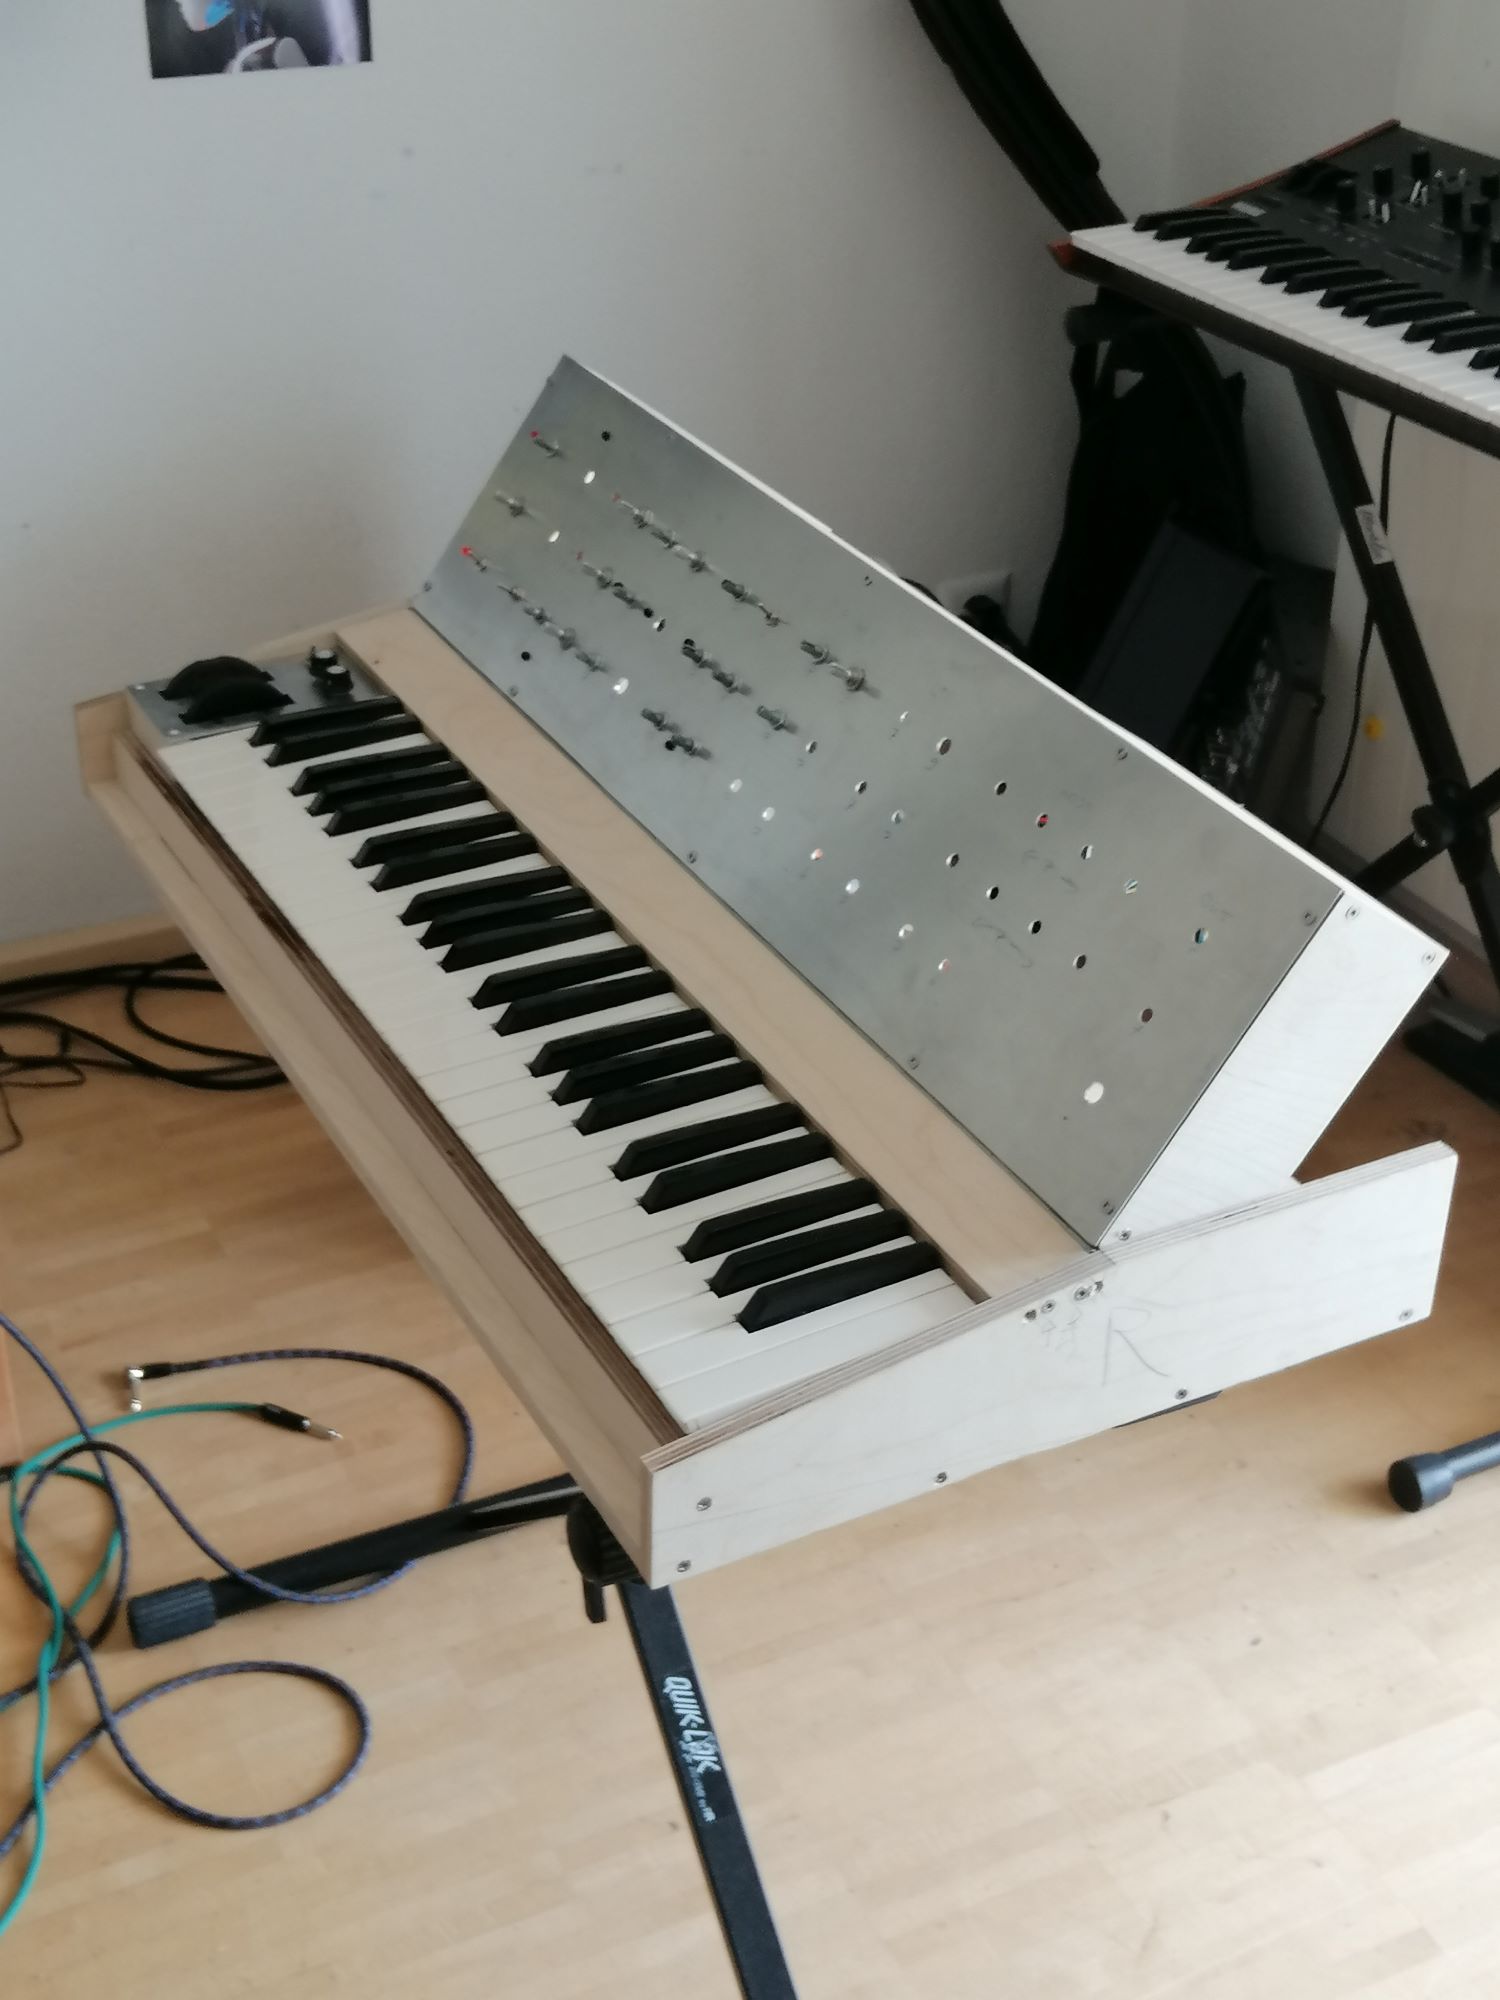
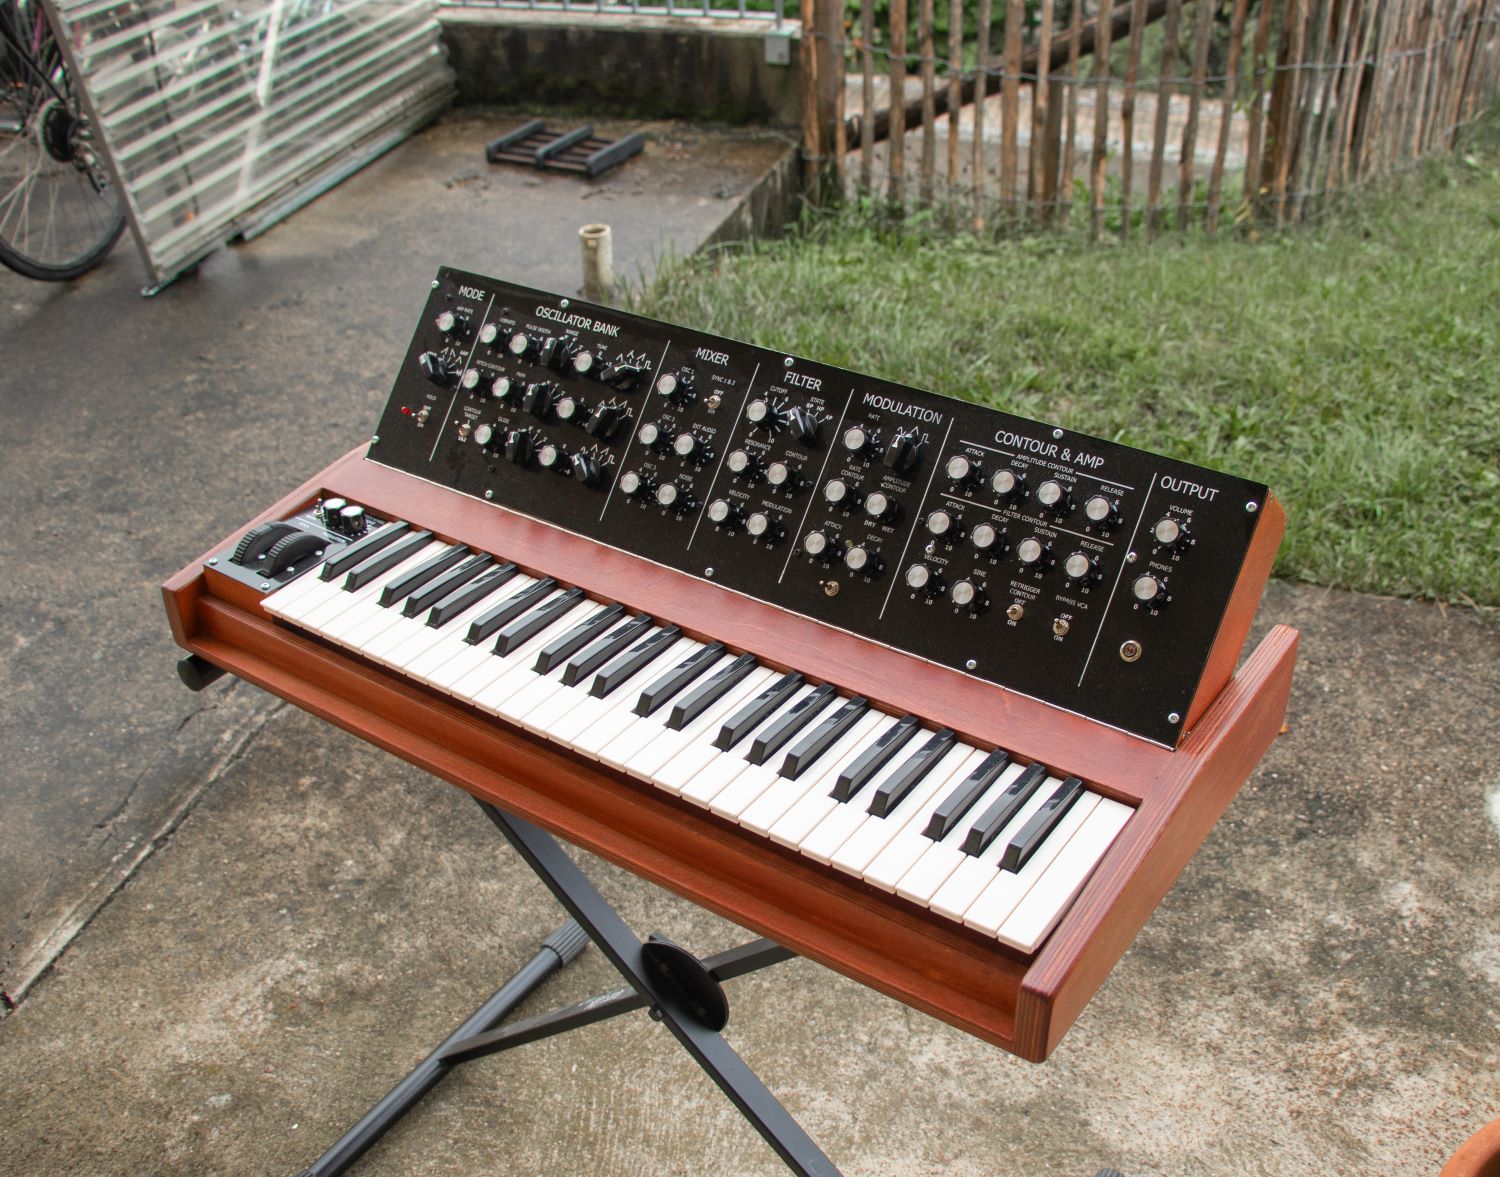
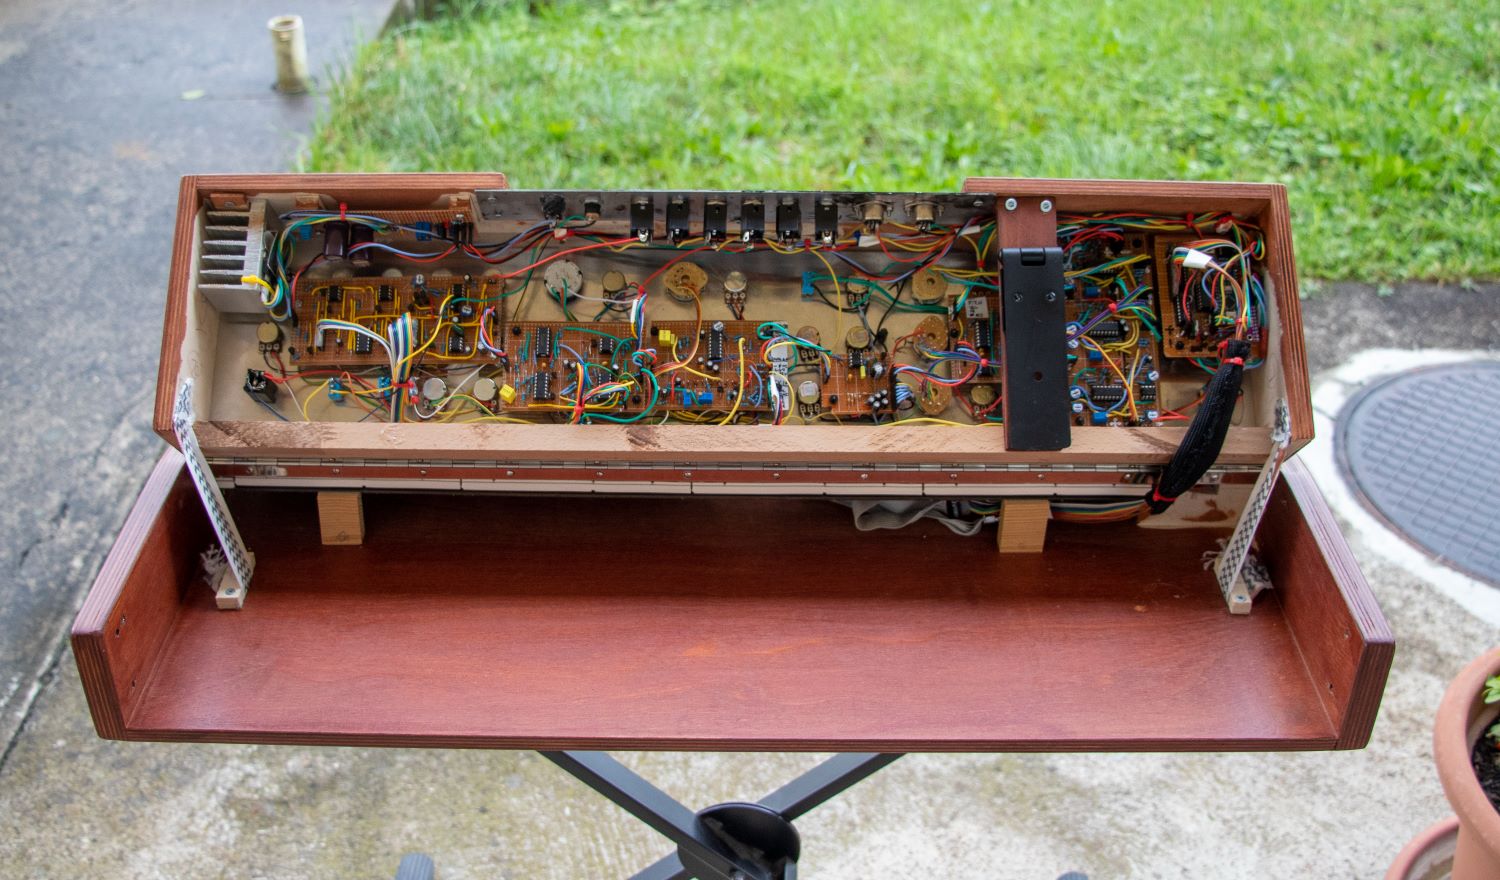
For my matura project, I constructed an analog monophonic synthesizer from scratch. I was greatly inspired by the memorable Moog Minimoog Model D which was the face of 1970s electronic music. This project involved planning and constructing the electronic circuits, assembling the body from wood and painting the aluminium front panel using screen printing. The keyboard would have been too difficult to construct myself, so I stole it from an old MIDI keyboard and planned my synthesizer around its dimensions.
My synthesizer uses the principle of subtractive synthesis which was popular in early analog synthesizers. First a simple waveform is generated using an oscillator circuit which should perfectly hit the correct pitch of a note. This waveform contains many natural overtones (high frequency content) due to its sharp edges. The second stage of a subtractive synthesizer is the filter (usually low-pass) which subtracts those overtones. Modulating various parameters like pitch, filter cutoff, output volume and more, the sound can be modeled to imitate many instruments.
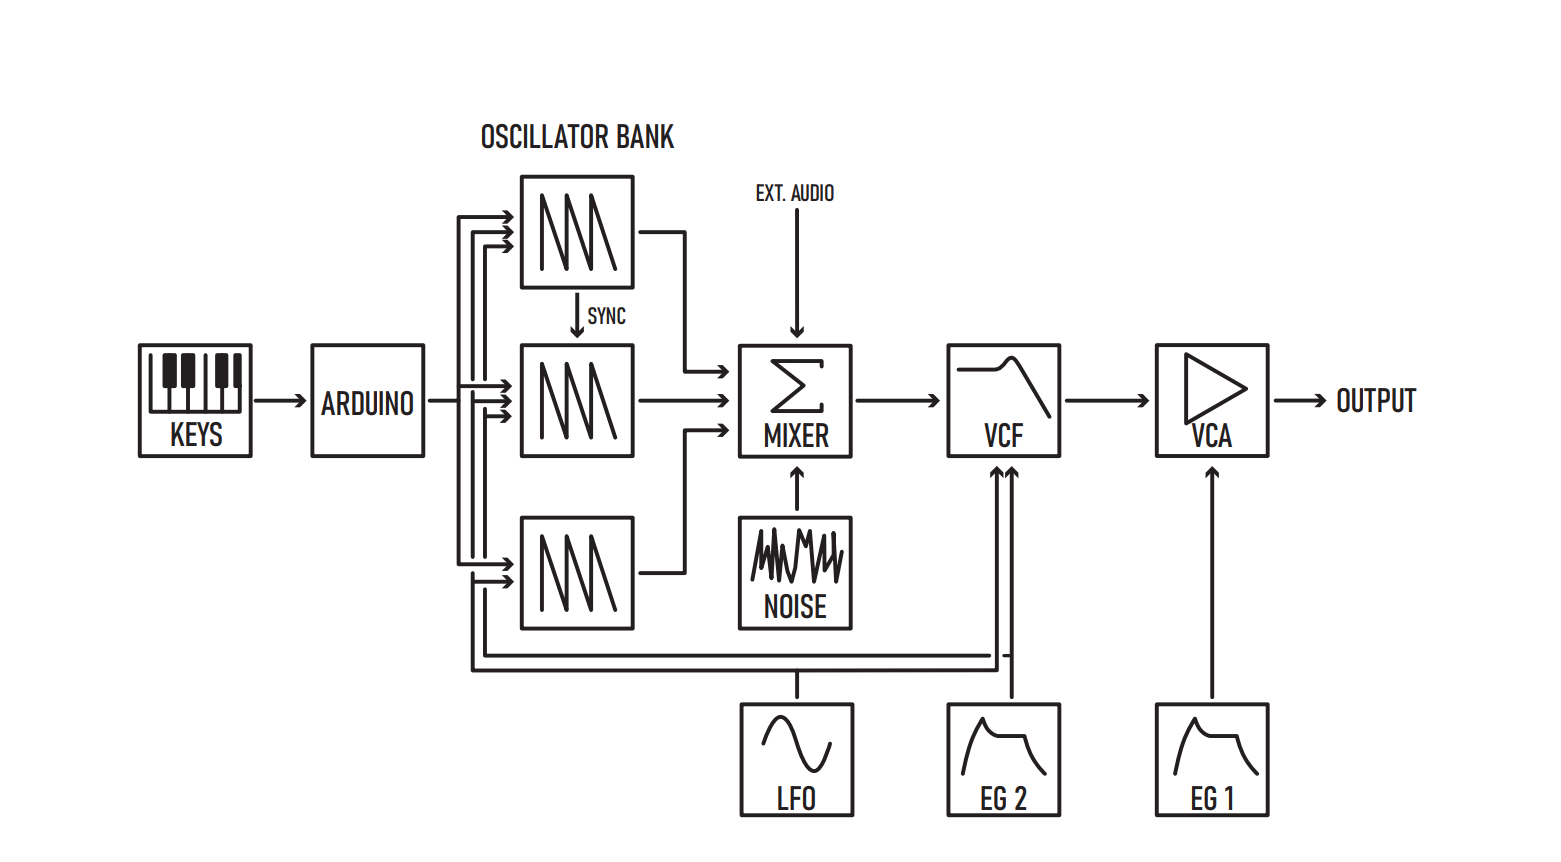
The main drawback of this synthesis is that only one note can be played at once, as it works similar to a human voice. Later, synthesizers were built which featured multiple of the mentioned circuit together to allow multiple notes. A few years later I have build a polyphonic synthesizer, which is mentioned in this post.